
Building a Face Recognizer in Python
In this article, you will discover how to build your own face recognizer using Python.
Building a program that detects and recognizes faces is a very interesting and fun project to get started with computer vision. In previous posts, I showed how to recognize text and also how to detect faces in an image, these are great projects to practice python in computer vision. Today, we will do something a little more advance and that is face recognition.
As can be understood from the name, we will write a program that will recognize faces in an image. When I say “program”, you can understand this as teaching a machine what to do and how to do it. I like to use teaching instead of programming because that’s actually what we will be doing. The best way of learning is teaching, so while teaching a machine how to detect faces, we are learning too. Before we start working on the project, I want to share the difference between face detection and face recognizer. This is something good to know.
Face Detection vs Face Recognition
These two things might sound very similar but actually, they are not the same. Let’s understand the difference so that we don’t miss the point.
Face Detection is the process of detecting faces, from an image or a video that doesn’t matter. The program doesn’t do anything more than finding the faces. But on the other hand, face recognition, the program that finds the faces and also it can tell which face belongs to who. So it is more informational than just detecting them.
To write a code that recognizes faces needs some training data, we should train our machine so that it knows the faces and who are they. In this project, we are the ones teaching our program. In machine learning, there are two types of learning; supervised and unsupervised. I will not go into details, in this project we are going to use supervised learning. Here is a nice post about machine learning methods.
Comparison Example
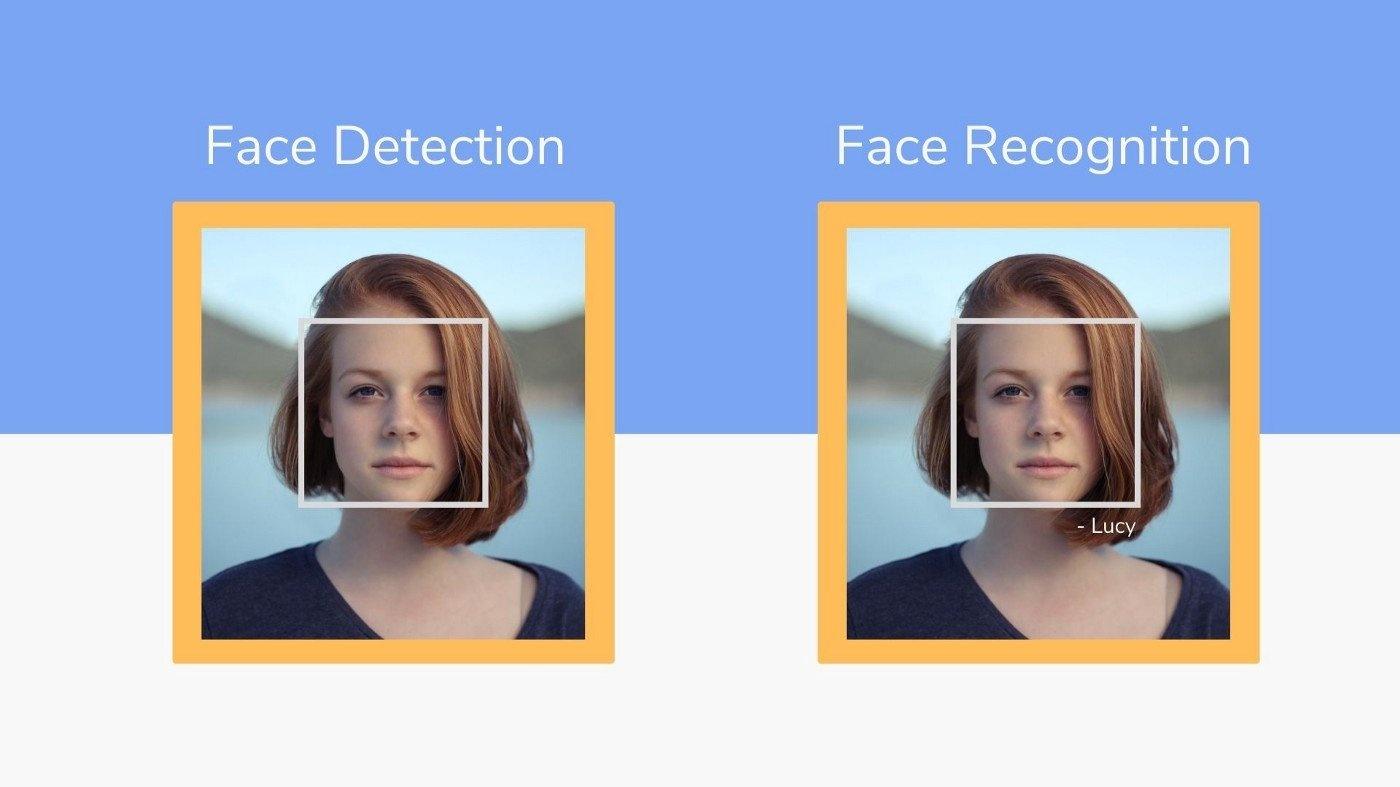
Photo by Christopher Campbell on Unsplash
Getting Started
We will use two main modules for this project, and they are called Face Recognition and OpenCV. OpenCV is a highly optimized library with a focus on real-time applications.
OpenCV (Open Source Computer Vision Library) is an open-source computer vision and machine learning software library. OpenCV was built to provide a common infrastructure for computer vision applications and to accelerate the use of machine perception in the commercial products. Being a BSD-licensed product, OpenCV makes it easy for businesses to utilize and modify the code.
Source: https://opencv.org
Libraries
We have to install some libraries so that our program works. Here is a list of the libraries we will install: cmake, face_recognition, numpy, opencv-python. Cmake is a prerequisite library so that face recognition library installation doesn’t give us an errors.
We can install them in one line using PIP library manager:

After the installation is completed, let’s import them into our code editor. Some of these libraries are included in Python that’s why we can import them without installing them.

Great! Now we move to the next step, where we will import images and use them to train our program.
Training the Images
First things first, let’s find our images.
Import Images
I’ve downloaded images of some famous people and added them to a new folder called “faces”. Also to get the current directory, in other words, the location of your program, we can use an os method called “getcwd()”.
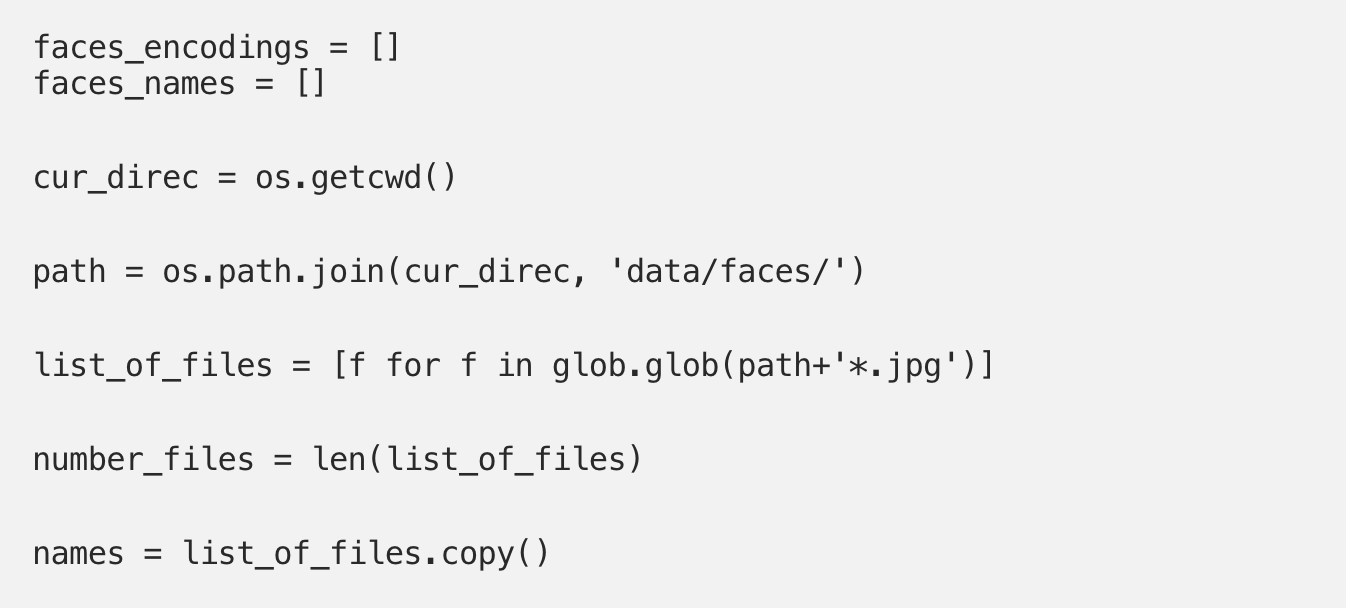
Understanding the lines above:
- All the images are in one folder named “faces”.
- Image file names have to be the name of the person in the image. (Such as: bill-gates.jpg).
- File names are listed and assigned to “names” variable.
- File types have to be the same. In this exercise, I used “jpg” format.
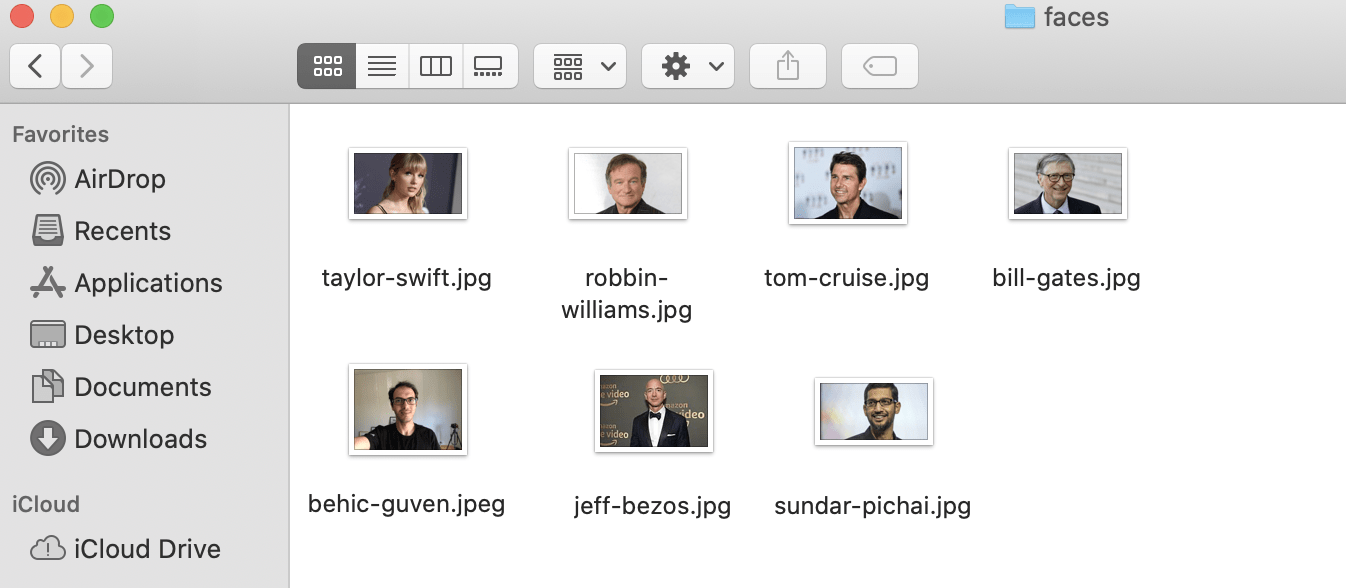
Here is my Folder Screenshot
Let’s move to the next step.
Train the Faces

To give you some idea, here is how my ‘names’ list looks like.
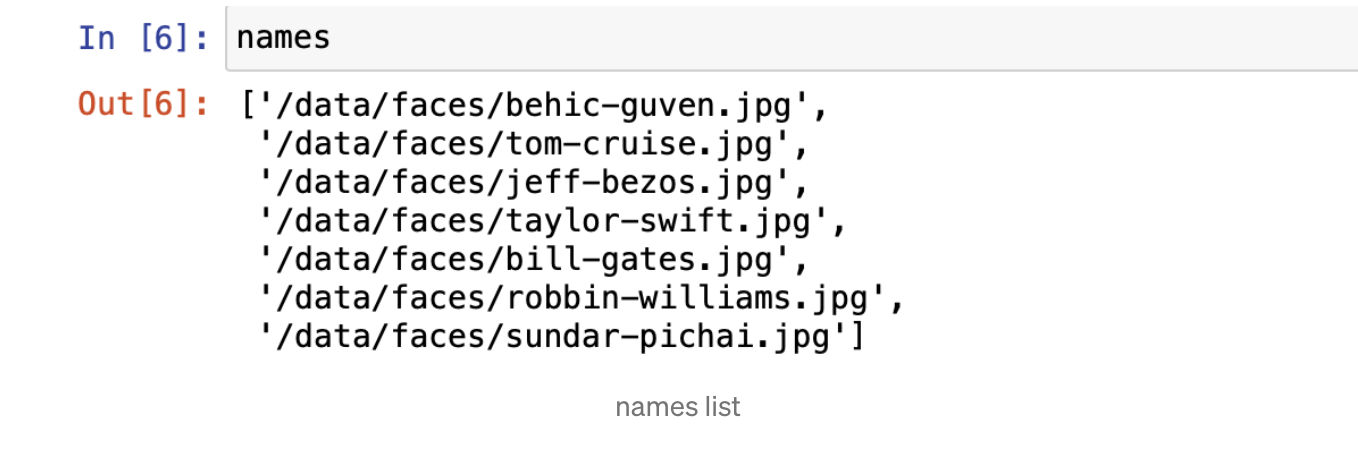
Great! The images are trained. In the following step, we will use the device’s webcam to see how our code performs.
Face Recognition
We have long lines of code in this step. If you go through it you can easily understand what is happening in each line. Let’s define the variables that will be needed.

Here comes the face recognition code. (You may need to reformat the spacing if you copy the following code, I recommend writing it from scratch by looking at the code, and also try to understand)
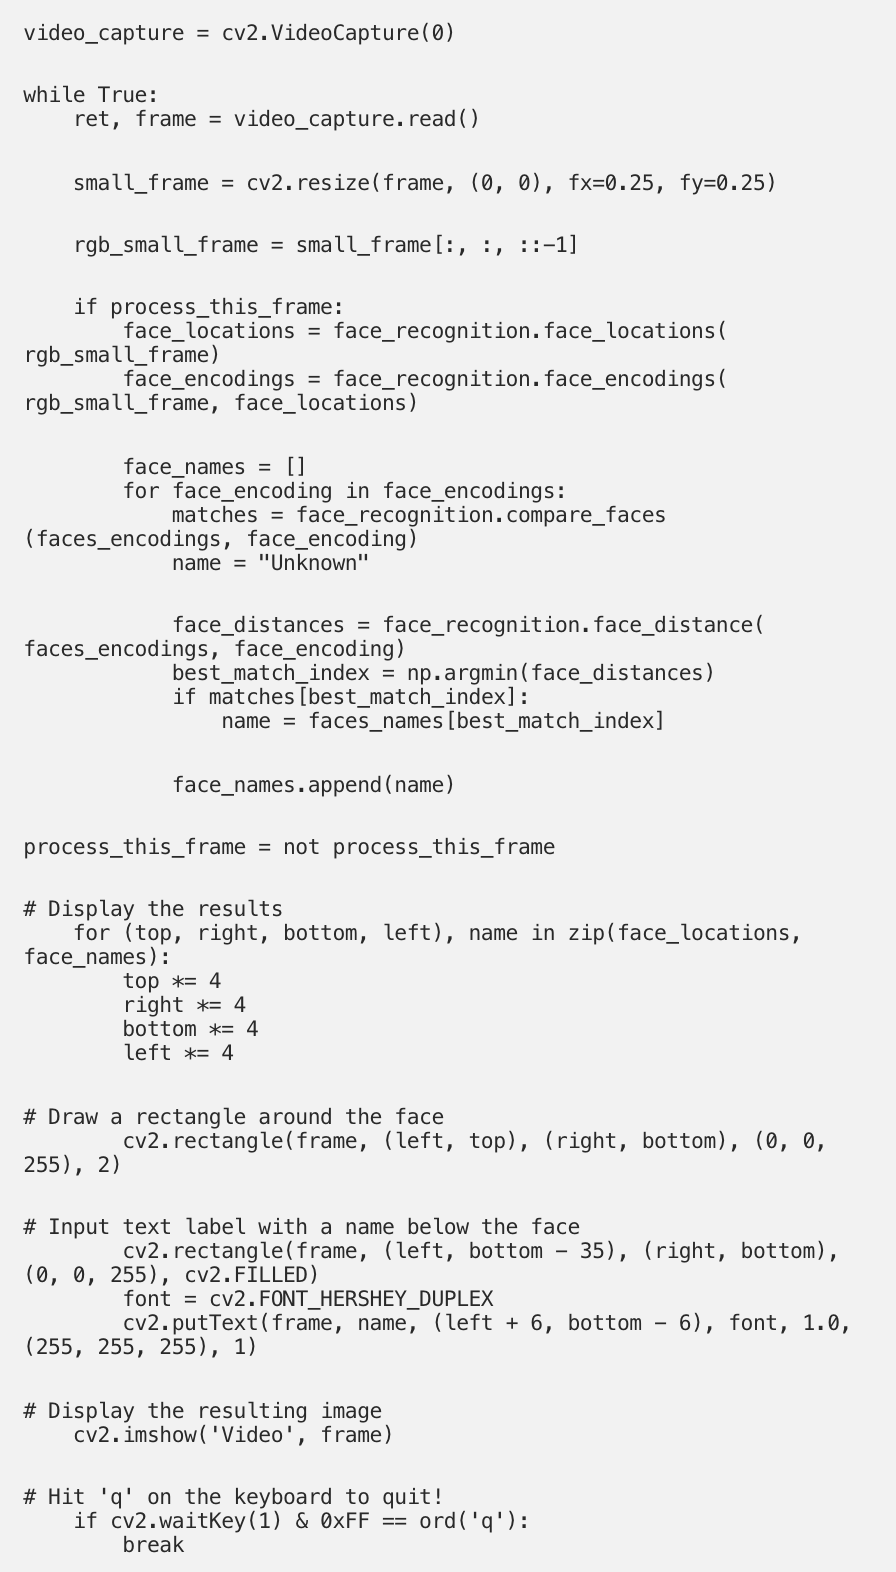
Testing the Recognizer
In the first picture, I am using the same exact image that was used in the training data.
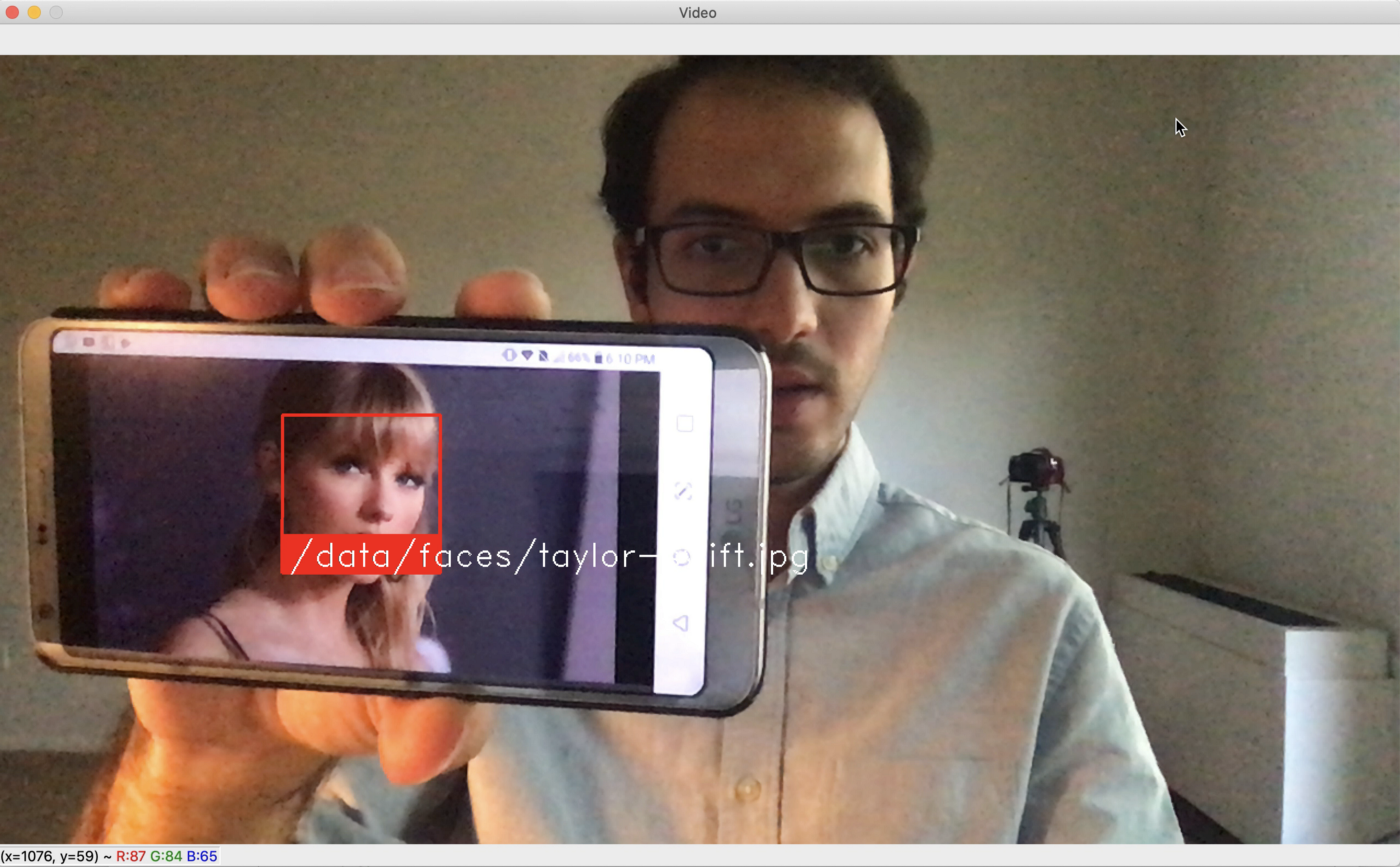
Face Recognizer Test 1
Now, I will try it with a different image of Taylor Swift. It works perfectly!
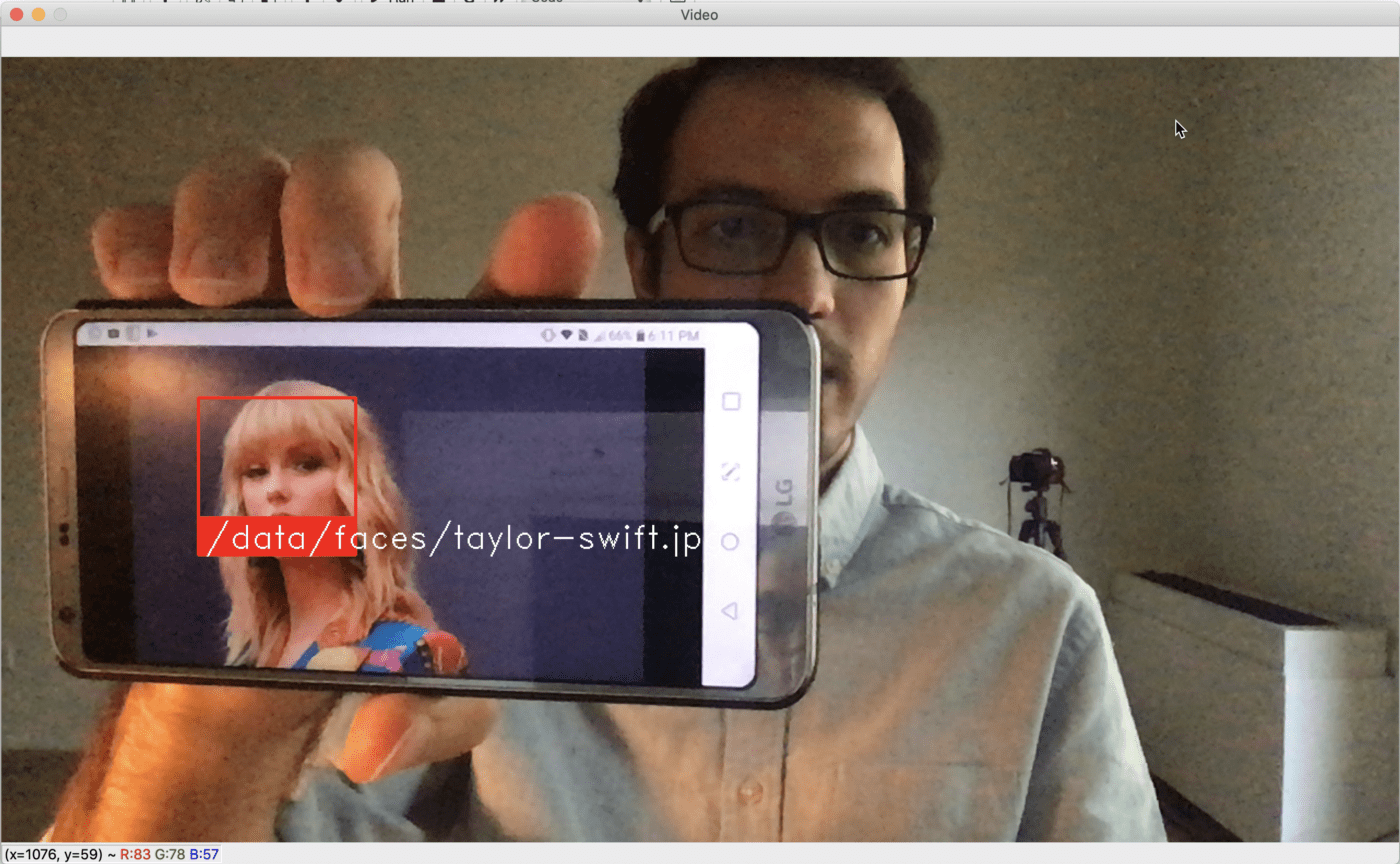
Face Recognizer Test 2
Congrats!! You have created a program that detects and also recognizes faces in an image. Now, you have an idea of how to use computer vision in a real project. Hoping that you enjoyed reading this step-by-step guide. I would be glad if you learned something new today. Working on hands-on programming projects like this one is the best way to sharpen your coding skills.
Feel free to contact me if you have any questions while implementing the code.
Trending
-
1 How Does SaaS Differ From IaaS And PaaS?
Fabrice Beaux -
2 Single Page Applications vs Multi-Page Applications
Fabrice Beaux -
3 Top 7 Effective Strategies for Multi-Language Website Development
Fabrice Beaux -
4 Boost Engagement to Infinity and Beyond: Unleashing AI-Driven Support
Anas Bouargane -
5 The Cheapest And Most Beautiful Stickers in CS2
Daniel Hall




Comments